So I have been feeling the desire to do a little more craft work and make some of my own paper again. I will say this is my first attempt at making paper since I only made one piece before back in approximately 1998 when at college.
For this little project to work I need to do some preparation work and will be making myself a Stretched Mesh in a wooden frame. Some felt inserts with handles and will need a blending machine, a shredder and baking paper to soak water and also a travel size iron.
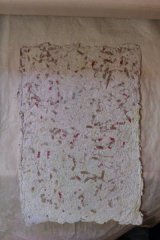
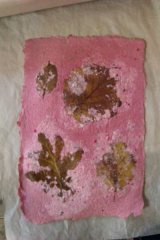
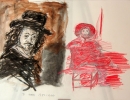
I made two pieces of paper so far which just as a test to see if my tools are working. they are still drying out. The first one has some herbs and spices added to it so it smells delicious 😉 – Here they are:
| Spiced up | Added leaves |
What is hand made paper?
My version of hand made paper is basically me recycling paper. I shredded up envelopes, junk make, newspaper, anything that is paper (that is not too shiny) and you do not want. I then soak this shredded paper for a short time to soften it up.
I then took my small blender which is big enough to make approximately 1 sheet of A4. I fill the blender up with about half way with water then take 2 or 3 big handfuls of shredded and soaked paper placing it in the blender. Turn the blender on and leave as long as you feel necessary. Add any colour or spices or anything you can think about in the blender at this stage. The bigger the pulp bits the thicker your sheet will be, the thinner the pulp will make flatter smoother paper.
It is this pulp that will make you the sheet of paper like above. Blitz up several loads and poor all this pulp in a bowl containing water.
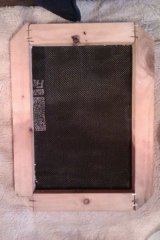
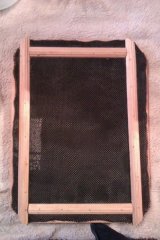
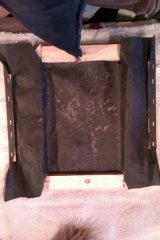
My stretched mesh:
| Front | Back |
The stretched mesh is made up of a wooden glued and stapled gunned frame and a mixed synthetic metal mesh also stapled and glued. This mesh needs to be very tight. I achieved this tightness by placing a hot heat gun in the direction of the mesh and it contracted nicely 🙂 giving a real spring to the mesh. You need a mesh so it will not soak and hold water, also because a fabric with too much fibre will adhere itself to the paper fibres.
This mesh is used to dip in the bowl of pulp you made, and you shake it about a little and lift keeping it level. Let the water drain out through the mesh but you will be left with a even spread of pulp (if you held it level when lifting out). Use a grill stand to place over the bowl if you desire to place the stretched mesh down to drain.
You then need to leave the pulp to dry out, at this stage you can add clour or leaves or glitter to the surface of the paper. Anything you desire really. Just poor a little pulp over the leaves to bond them to the paper. Also get something flat and press against the paper in the mesh to flatten it down and squeeze out water.
My insert for the mesh:
Ok so that is the way I was taught at college, but being my kitchen, my bowls and sink are not huge and I do not want to make millions of mesh stretchers to make more than one sheet (because the drying) I decided to devise a new way. I made inserts that can be removed from the stretcher with the paper on it to dry out. So I can reuse the stretcher. It worked out pretty well.
I cut up some felt, it is garden felt that stops weeds growing through. It lets water pass through still which is perfect. It has no visible holes in it so does not loose much if any of the pulp yet the water drains away. I attached two pieces of wood wither end to aid in lifting the felt out. I only lift it out once I pressed out most the water with something flat and I lay the felt down to dry.
I made six of these so I can make six sheets a time. I can make more if desired as I only need two little beads of wood and a small piece of felt that can be purchased in entire rolls cheap in B&Q.
| The Felt Insert |
Drying the paper:
I helped the paper in it’s drying process by using a hair dryer directed at the bottom of the felt, because if the underside dries then I can safely peel it off without issues. I then also used a travel iron with the paper placed between pieces of baking paper. This helped a lot in flattening and drying.
Conclusion:
I will experiment a lot more and try new things. It is very therapeutic making paper and seeing all this junk mail put to good use for free! 🙂 – I will try making books and cards from this paper or even do some painting on it! 🙂
