


Hair is a tough thing to draw. I have had some great feedback from people who loved how I did my hair, while one has told me my hair looks a tad scruffy and I should practice. It depends on the artists perspective and approach to art.
Personally I like my drawings to retain an arty look, I want to develop a style I can identify as mine, much in the way a persons handwriting is unique. I believe a drawing should remain looking like a drawing whilst I like to be as accurate as I can be. If my drawings ever started to look too photo realistic then I would start to think I have lost what art is about and that I would no longer have a style that can be identified with myself.
I am not entirely fussy with hair but I do need to improve, currently my methods to drawing are entirely self developed, except for the fact I found out about blending stumps and tortillions by google, a discovery I am so happy about!.
===================
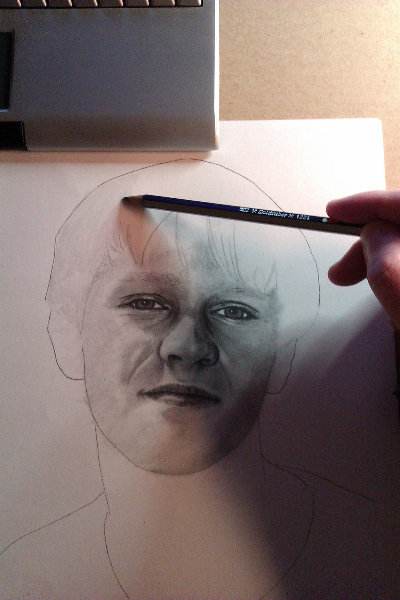
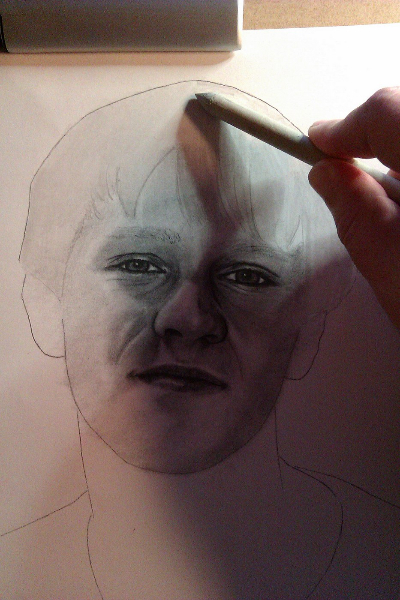
The images in each stage have been created a lot quicker than I normally work, so they are not so polished a my usual work. It is just for this tutorial.
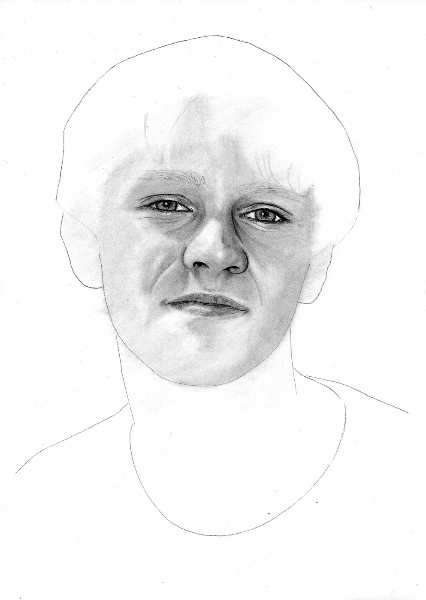
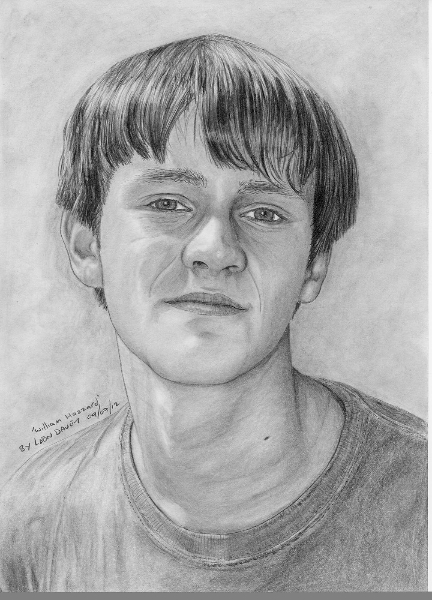
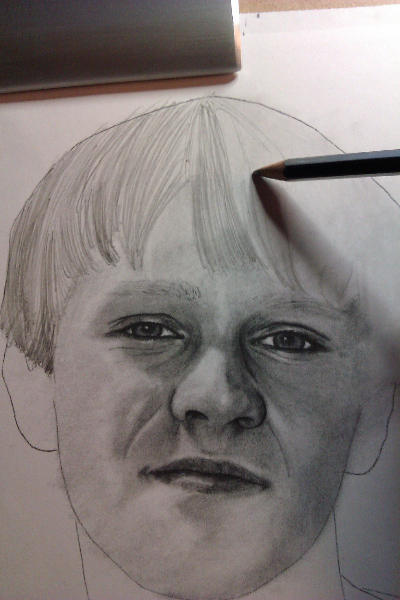
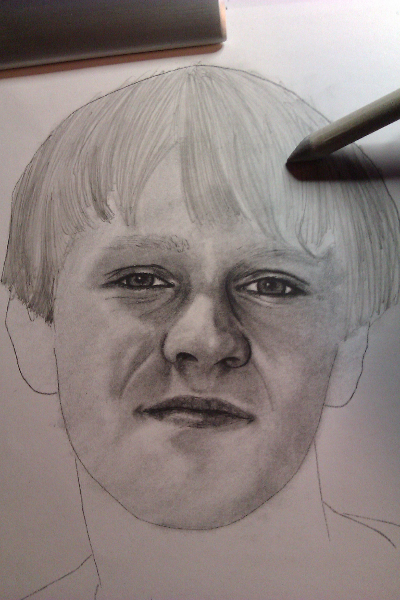
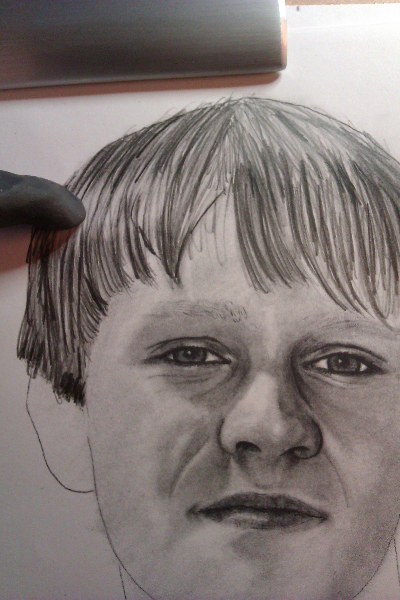
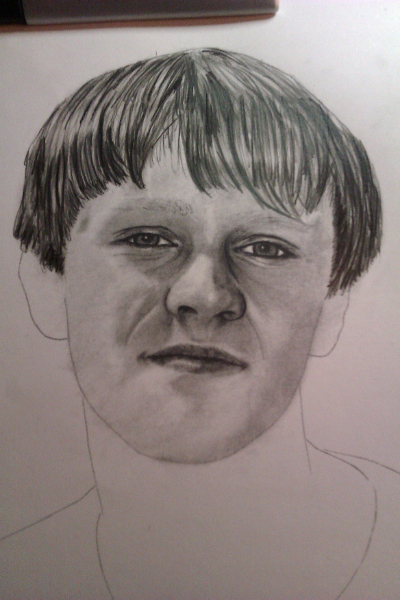
Here is an early stage of my drawing of my nephew William. I am going to draw in his hair in stages. The hair should end up looking something like (I hope) my finished drawing also as below.
|
|
Equipment used were Pencils 2H, HB, 2B, 4B, 6B & Mechanical Pencil (2B), Putty Rubber & Blending Stump.
———–
Stage 1:
Shade in the hair lightly with a 2H grade pencil (you can use HB if that all you have, changing the pressure used depending on the stages but results wont be as good) –
Stage 2:
Get your blending stump or tortillion, and smudge the shading till it is even and smooth (use cotton buds or cotton wool if that is all you have)
Stage 3:
With a HB pencil, draw some strands of hair working from left to right if right handed. Do this untill the previous shaded area is covered with strands.
Stage 4:
Using a blending stump, smudge the layer of hairs, but do not be too forceful as you only want to lightly smudge them to give the layer some smoothness.
Stage 5:
Now we want to start getting even darker with a 2B pencil, draw some random strands of hair working from left to right if right handed. Do a similar coverage of strands as you did when using the HB pencil.
Stage 6:
Again, now we want to go even darker, using a 4B pencil, however this time we need to think more about the placement of the hair lines as we are going to draw full length strands as well as shorter strands for some shadows. You can still be quite random but change the randomness a bit so you get the mix of short and long.
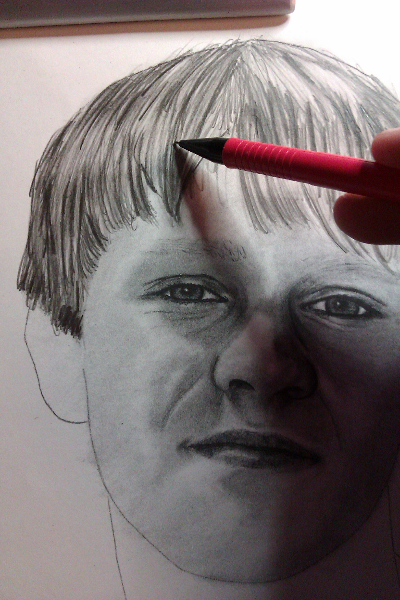
Step 7:
Now get a PUTTY / Kneadable Eraser and gently swipe it over any dark areas that you feel needs lightening up. You will know if any areas need it, just look at the reference image you draw from.
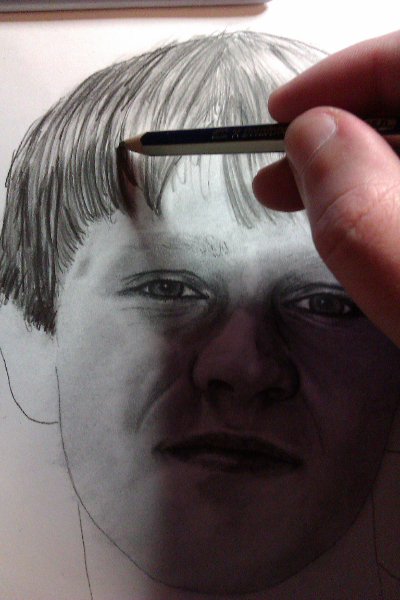
Step 8:
Using a Mechanical Pencil (a pencil you push a button on to get a fine piece of lead) – if you do not have a Mechanical Pencil use a newly sharpened HB. Draw very lightly thin lines of detail over the entire hair area as rapidly as you can. Be quick with it as this will help keep the strands thin. You will soon learn a technique that works for you.
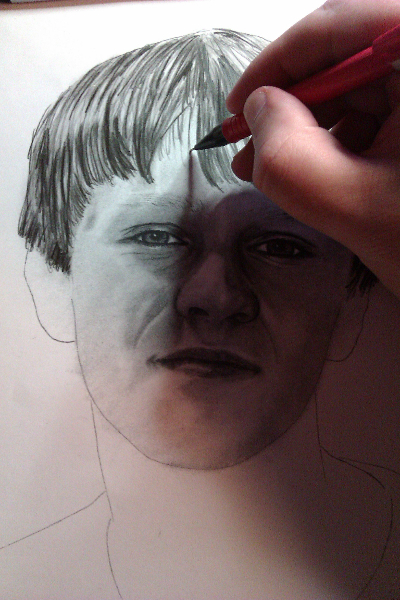
Step 9:
Now we use a 6B (the darkest pencil I have) and the same as we did in Step 6 we need to think more about the placement of the hair lines as we are going to draw full length strands as well as shorter strands for some shadows. This is our final layer and so we need to use the reference image more often to make sure the darkest areas of the hair are drawn in. Take your time on this layer more than any other.
Step 10:
Back to the Mechanical Pencil for some final touches of detail. We will draw in any strands of single hair that fall over the face for instance. Or rapid lines in areas which maybe are too lightly shaded, to get a better effect of layers of hair. Take your time.
FINISHED HAIR
|
|
As you can see this is far from the standard of my original drawing. That's because I spent a lot longer in each layer. As this is just a tutorial I have worked pretty quickly and took about 30 mins with taking the photos. I would spend probably spent x 3 longer than that drawing the hair on my original piece.
Hope this helps and good luck 🙂
