Drawing Tips

Eyes, Ears & Nose Placement

Thought I would share with you something I have discovered about ‘Facial Features’ while drawing Portraits. Although almost everyone has a unique appearance, there are also huge similarities amongst the face of each person (probably some rare exceptions).

So while drawing Portraits I have found a general rule to help with getting the features of the face in roughly the right places, then you can tweak them at a later time as the drawing progresses.

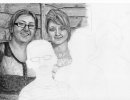
For this short Tutorial, I will use a very old sketch of mine of my Mother as an example, and a more recent Drawing of a famous Band to show examples of how the general rule varies.

My Mother: (Click for larger image)

Rascal Flatts: (click for larger image)

1. Lets start with EARS (the biggest topic)

As you can see I have marked with red lines where the TOP and BOTTOM of the ‘Ear’s meet up with the ‘Eye Brows’ and ‘Nose’. The rule is the TOP of the ‘Ear’ will come somewhere between the ‘Eye Brow’ and the ‘Eye Lid’, and that the BOTTOM of the ‘Ears’ will always land somewhere between the Bottom of the ‘Nose’ and Top of the ‘Mouth’. Reason for the variation is because if someone has their head tilted backwards, then the ‘Ears’ will appear lower, but if someone has their head tilted forward the ‘Ears’ will appear higher. So it is all about the perspective, your view point of the subject at the time. But if you are looking at someone dead on. The ‘Ears’ will almost always be dead in line with the ‘Eye Brow’ and Bottom of ‘Nose’. (see ‘Rascal Flatts’ for an image showing some variances of placements)

=============

It has been brought to my attention by a visitor ‘Chris Condrup’ that the Human ‘Ears’ and also ‘Nose’ continues to grow with age, however by only a small amount. But this can have an impact on drawing the ear positioning of older people. So for older people it might be wise to draw the ear nearer to the eyebrow and upper lip 🙂 – thank you ‘Chris Condrup’.

2. Lets talk about MOUTHS

So there is also a rule for ‘Mouths’. If you look at my Mother again, see the blue lines. The edges of the ‘Mouth’ almost always line up with the inner portion of the ‘Iris’ of the ‘Eyes’. This is the part of the Iris nearer to the ‘Nose’. This rule almost never fails so is an easy one.

3. Lets talk about Size of the NOSE (I did no markings on drawings for this rule)

This rule can often have exceptions, but is a good starting point. Look at the bottom of my Mothers ‘Nose’. The width of it lines up perfectly with the inner corner of the ‘Eye Slit’, where the top and bottom eye lids meet up (nearest to the ‘Nose’). Use your imagination to visualize a line. Also look at the ‘Rascal Flatts’ drawing and see the man on the right hand side (no.3). The same rule is applied to him. Sketch the ‘Nose’ out to this rule and just re-size it later if need be.

================

So, if you follow these three rules when sketching out a template to start a new drawing. Get the ‘Ears’ and ‘Eyes’ and ‘Nose’ to line up in approximately those places then it will help you achieve far greater accuracy later in the drawing. Just remember to adjust the ‘Ears’ slightly depending on your viewpoint of the subject you are drawing!


Hope this helps you.

Share

How I currently approach drawing Hair – 10.11.12

Hair is a tough thing to draw. I have had some great feedback from people who loved how I did my hair, while one has told me my hair looks a tad scruffy and I should practice. It depends on the artists perspective and approach to art.

Personally I like my drawings to retain an arty look, I want to develop a style I can identify as mine, much in the way a persons handwriting is unique. I believe a drawing should remain looking like a drawing whilst I like to be as accurate as I can be. If my drawings ever started to look too photo realistic then I would start to think I have lost what art is about and that I would no longer have a style that can be identified with myself.

I am not entirely fussy with hair but I do need to improve, currently my methods to drawing are entirely self developed, except for the fact I found out about blending stumps and tortillions by google, a discovery I am so happy about!.

===================

The images in each stage have been created a lot quicker than I normally work, so they are not so polished a my usual work. It is just for this tutorial.

Here is an early stage of my drawing of my nephew William. I am going to draw in his hair in stages. The hair should end up looking something like (I hope) my finished drawing also as below.

js57_hair-tutorial-will-wip1 js57_william-hazzard-090712

Equipment used were Pencils 2H, HB, 2B, 4B, 6B & Mechanical Pencil (2B), Putty Rubber & Blending Stump.

———–

Stage 1:

Shade in the hair lightly with a 2H grade pencil (you can use HB if that all you have, changing the pressure used depending on the stages but results wont be as good) –

1

Stage 2:

Get your blending stump or tortillion, and smudge the shading till it is even and smooth (use cotton buds or cotton wool if that is all you have)

2

Stage 3:

With a HB pencil, draw some strands of hair working from left to right if right handed. Do this untill the previous shaded area is covered with strands.

3

Stage 4:

Using a blending stump, smudge the layer of hairs, but do not be too forceful as you only want to lightly smudge them to give the layer some smoothness.

4

Stage 5:

Now we want to start getting even darker with a 2B pencil, draw some random strands of hair working from left to right if right handed. Do a similar coverage of strands as you did when using the HB pencil.

5

Stage 6:

Again, now we want to go even darker, using a 4B pencil, however this time we need to think more about the placement of the hair lines as we are going to draw full length strands as well as shorter strands for some shadows. You can still be quite random but change the randomness a bit so you get the mix of short and long.

6

Step 7:

Now get a PUTTY / Kneadable Eraser and gently swipe it over any dark areas that you feel needs lightening up. You will know if any areas need it, just look at the reference image you draw from.

7

Step 8:

Using a Mechanical Pencil (a pencil you push a button on to get a fine piece of lead) – if you do not have a Mechanical Pencil use a newly sharpened HB. Draw very lightly thin lines of detail over the entire hair area as rapidly as you can. Be quick with it as this will help keep the strands thin. You will soon learn a technique that works for you.

8

Step 9:

Now we use a 6B (the darkest pencil I have) and the same as we did in Step 6 we need to think more about the placement of the hair lines as we are going to draw full length strands as well as shorter strands for some shadows. This is our final layer and so we need to use the reference image more often to make sure the darkest areas of the hair are drawn in. Take your time on this layer more than any other.

9

Step 10:

Back to the Mechanical Pencil for some final touches of detail. We will draw in any strands of single hair that fall over the face for instance. Or rapid lines in areas which maybe are too lightly shaded, to get a better effect of layers of hair. Take your time.

10

FINISHED HAIR

11 js57_william-hazzard-090712

As you can see this is far from the standard of my original drawing. That's because I spent a lot longer in each layer. As this is just a tutorial I have worked pretty quickly and took about 30 mins with taking the photos. I would spend probably spent x 3 longer than that drawing the hair on my original piece.

Hope this helps and good luck 🙂

Share

Basic advice given to a friend for a beginner (his daughter).

Also See: 'Where to start drawing?' <Click Here>

Also See: 'Eyes, Ears & Nose Placement <Click Here>

————————-

A Friend asked me for some advice for his daughter just starting out in Art

==============

My advice for beginners.

I am no expert but some friendly advice. I wish her good luck and tell her she needs to keep practicing and practicing. Drawing is mostly self taught so only guidance can really be provided. Some tips work for some and not for others. You just need to try things and pratice, and do not think you are rubbish at it because the results are not as good as you seen others do, these others I refer to have practiced a lot and started out no different than I did.

If you saw some of my earliest works when I was about between 10 – 15 years you would laugh. But I did not let failure stop me. I got frustrated and annoyed but I kept on trying with it, but I have a father that told me I am doing good so that helps.

What does not help is people do not realize you need good equipment to get results like I have achieved recently. – but they are not cheap and not ideal for beginners. You need good paper, good pencils. But these should not be wasted.

Get a HB pencil and any paper will do for now, practice doing sketching not drawing. Try doing still life, set some objects up and draw it. I did not do this but started straight into drawing people, however I had no one to guide me, and when I went to college they taught by doing still life first. This was good as you wont get frustrated of not getting a face looking right but a banana for instance will look like a banana even if not totally accurate. It will help you to observe forms and draw them before attempting a more challenging face.

Learn to get the shapes right of faces, eyes nose mouth and hands etc – sketching will take a long time at first, forget what I said about sketching being fast, at the begining do it slowly. It wont happen straight away but with each attempt it gets easier. Then later think about moving on to better paper and pencils.

My general rule at the moment is start by getting the outline of the face the right shape. Get the eyes, nose and mouth in position. Stand back and look at your work from a distance from time to time to check the accuracy, also try looking at it under different light sources. If I am working on the same scale as my source image and I am unsure of my accuracy I sometimes use a plotting compass to verify how correct I am. More often than not I am accurate enough and do not make adjustments. If your still unsure about the accuracy of your facial features, try drawing in the first layer of hair. Adding the hair really helps bring out those features!

But do not become reliant on Plotting Compasses as you need to be able to draw fairly well freehand! or you will have problems when you attempt to draw larger or smaller than your source material, specially if you are drawing from a still life. This is where learning to draw from a still life is great as this will develop your free hand abilities and increase you observation skills of the environment around you and all the lights and shadows and depth of field. These can not be gained so easily from flat 2d source images.

————————-

Also See: 'Where to start drawing?' <Click Here>

Also See: 'Eyes, Ears & Nose Placement <Click Here>


Share

Question: how do you know where to start drawing ?

Also See: ' Eyes, Ears & Nose Placement' <CLICK HERE>
————————————————-

A Question I was asked:

How do you know where to start drawing a picture ? with 5 people in it ? – I know you started left to right but why ? is that just better for yourself or is there some way that you are suppose to start a picture ? don't forget you are talking to somebody who hasnt drawn a picture for 10 years or more 😐 😐 and even then mine wasnt very good but yours is looking good mate 🙂
===========================

This is a question I have been asked a few times so thought I will post my latest reply here. The question is below and my answer is further down the page. This question relates to my recent drawing of five people in one portrait for my Auntie Pam. Portrait is at bottom of the page.

Answer:

To be honest their is no rules to drawing, it is simply what works best for the individual which you find from just trying things. I start from the left as you said. But It is only because I am RIGHT handed and I discovered the hard way that I MUST work left to right or my hand will end up resting against what I have already drawn which ends up smudging my hard work. So working left to right means I am not going to smudge anything.I find it is also wise to Start at the top of the page if possible, so as you work down again you wont be smudging your work.

Remember, drawing is all about building layers, from lighter to darker. Drawing and Sketching is different in my opinion. Drawing is time consuming and about layers upon layers, sketching is one or two layered pieces of work done quickly and often just outlines. Sketching is good for recording things quickly or on the move for use later. Drawing is more a polished finished piece.

As for how to start a drawing, I actually ask myself this every time as it is daunting to look at a blank page. – I asked myself this when starting each new face on this drawing!

My general rule at the moment is start by getting the outline of the face the right shape. Get the eyes, nose and mouth in position. I am right handed so I work from left to right and top to bottom to avoid smudging my work.

Once I have got a fairly accurate outline I start with getting the first layers of detail in the eyes and mouth, and then I put a first layer of hair on. Seeing the hair really helps to bring out the features to see if the drawing is looking right. If it is I then add the first layer of shading. Then back to the eyes, lips, nose, then shading etc.

I never know where to really start but this is a basic rule to help me get started if I am undecided.

What about painting? Now painting is a different thing all together as you generally start with the lightest background colours, and build up layers to darker tones, anywhere on the page that it needs to be, there is no left to right business as the hand never normally rests on the page.

 
Auntie Pam's Grandchildren 041211
 
————————————————-
————————————————-
Share

MAIN Tools (currently)

This is the line up of my most used tools when doing portraits in graphite.

You may find it strange to see a compass and builders sharpener in this photo? Actually I find those items extremely important tools!

Compass: – This compass is designed for precise measurements, and can take two leads either side. I use this when doing a straight 1:1 drawing from reference material. When measuring to map out the template. I do draw mostly free hand and find I am fairly accurate most of the time but for delicate features that will ultimately decide if I captured likeness or not I will get out this handy tool and check it. Got it cheap from ALDI’s

Builders Sharpener: – (ROLSON) This is used mostly for the big black chunky Faber Castell PITT pencil you can see. Despite being informed on the packaging of these pencils, that a normal sharpener can sharpen this beast, it does not and I always use good sharpeners! This builders sharpener will do the trick nicely and has some file texture on the side to file the lead to a point 🙂

Small Metal Sharpener: – (Faber Castell) A good sharpener is important, would you use a cheap plastic one on an expensive pencil? no, never do that, if you pay for expensive pencils use a good metal sharpener, because you will only break the lead with a cheap one!

PUTTY RUBBER: – (WHSMITH) Yep that grey clumpy ball is a PUTTY rubber. Very important piece of equipment! So many people who do not do a lot of drawing are always suprised I use a rubber, as they have been taught that an eraser is to remove mistakes. I try to explain to them to re-educate them that in ART there is no such thing as mistakes, you rework something till it is how you require. A rubber is a tool and I use it purposely and tactfully the same way as I use a pencil, for instance I make heavy dark marks quite often planning to remove some of the heaviness later with the putty rubber. It is all about using whatever is at my disposal to get the effect I require. The Putty Rubber is great for this.

Eraser: – A standard eraser although this one is Winsor & Newton, it is smudge and flake free. It does the job well enough, but to be honest cost is not totally always better. I have a cheaper Steadtler one that was not sold as an artist tool and is better. Again this is not for erasing mistakes! but if I ever do slip up it is useful 😉

Faber Castell Pencils: – ‘Goldfaber Series’ these have proven to be excellent pencils at the middle range cost. I used fairly good WHSMITH ones before this, but to get the results I am today, WHSMITH ones would never do it. Got to have decent pencils, ‘Faber & Castell’ are amongst the best about but I am not biased toward any one brand in particular. Derwent are also worth a look.

Faber Castell PITT Pencils: – ‘2900 series’ Pure Graphite Pencils. These are chunky and woodless, they are PURE graphite and very black if you go thick enough with layers. I use these on large dark areas specially good for hair and backgrounds or clothing. This is what the Builders Sharpener is for!

Mechanical Pencils: – I have quite a few of these including various lead grades and coloured leads. These are fantastic for small details specially around eyes, lips, and mostly great for having to draw stubble and beards! I love them. They are those pencils that take those tiny long lead refills. I have 05.mm and 0.7mm pencils. Mostly use the 0.5mm. Every drawing I do will have some detail made by these pencils!

Derwent Pencil Extender: – Got two of these, they are used to extend your remaining pencil when it gets short and difficult to use. Were not cheap, and look like they should cost less but don’t be fooled, they are made out of alloy and have a nice finish that feels rubbery and comfortable. They grip the pencil nicely and fit many sizes. They are worth the expense, after all you buy pencils that are expensive and why waste them when they get short? you want to use up every last bit of the pencil right?

Blending Stumps: – As mentioned elsewhere on this site, Blending stumps are used to smudge and smooth the pencil finish to get those much needed blended shades of colour, specially if drawing faces! – have 3 of these at different sizes.

Tortillions: – As you can see I placed a Tortillion in the photo, I do not use these so often as the Blending Stumps, but they are an essential tool and cheap to buy or try making them yourself.

Cotton Buds: – YES, I even use cotton buds. Sometimes that extra bit of softening requires some cotton wool, ideal aswell for removing some excess pencil if a Putty Rubber will take too much off. And great for clothing and skys.

A Drawing Pad: – The quality of the paper is up most important but also shamefully the most expensive piece. I have tried so hard to find a middle ranged price paper that is smooth enough, thick enough yet with few imperfections that make detail suddenly go patchy. I have failed yet to find this native in the UK. Even top manufacturers over here like Winsor & Newton and Derwent, Reeves, to name a few just do not sell what meets my expectation and is expensive. In the USA there are some great quality paper manufacturers like Srathmore and Canson but they are hard to get here. I have found some Canson here in UK but not the top range. Strathmore is the best and to buy it over here requires mail order and additional cost than in the USA. – So at the moment I am using a low to mid range Winsor & Newton. I am not happy with it but it is ok for now as I am still starting out. I might look in to investing in Strathmore later 🙂

Last but not least, two items I did not put in this photo:

Sand Paper: – need this to clean and sharpen up the blending stumps. A fine sand paper is best. A rough sand paper could destroy your blending stump.

Small Containers: – right you pay a lot for your good quality graphite or chalk etc? – why waste it! When I sharpen my Graphite Pencils, I collect the dust and stick it in a container with the grade written on it! – might sound overboard but it is not. You lose a lot of what you paid for when sharpening! – and believe me the cost of these material soon start to impact you when you draw a lot. Keep it in a container guys, and there is many opportunities that will occur when you will think ‘oh I can use some of that graphite dust right now’ to do some clothing or some clouds? who knows.

That’s my list for now, thank you for taking the time to read this far, I will be back with some updates soon 🙂

Share

Results with Tortillions

So my first time using Tortillions was home made ones. I got frustrated with not knowing how to blend a face and did some research which led me to make my own set of tortillions and try them out.

Early attempts at making them failed badly, my Dad then joined in with making them and he had better results. The actual Tortillion was not bad at all but I think the paper was not too good.

Anyway, here is the drawing I did just before using any Tortillion and how I was scared to shade the face because the subject would just look old!

Last drawing before trying Tortillion:

js57_brian-070512As you can see, I struggled not making the facial features look aged. Consequences is I missed out lots of true detail and really ended up with nothing more than a sketch. But still I was pleased with my work but frustrated I could not do what I seen others do!

Frustrated then led me to make my own Tortillions and I dived straight in to try them out.

Next drawing using my Home Made Tortillion:

js57_seychelle-gabriel-110512A home made Tortillion gave me a sudden huge improvement! although I was now limited by the weakness of my home made product! – I was very happy I was suddenly able to shade a face! although a bit patchy which as I mentioned was due to the Tortillion, I was enjoying myself breaking new boundaries that had stumped me for a long time Big Smile and the Tortillion was especially very good when it came to blending the lace dress! – time to try again with a better Tortillion?

Next drawing was with a Professionally Manufactured Tortillion:

js57_vin_diesel-finishedSeriously, this was my 2nd drawing with a Tortillion. And my first drawing with a proper Tortillion! – amazing what a difference it makes. I have nearly no experience with shading at all at this point but with a decent tool I was able to achieve this? – seriously if you want to draw portraits you must use ‘Tortillions or Blending Stumps’ – how come in my years at Art & Design classes was I not taught this simple thing? or was I just ignorant to what was being taught and happening around me?

Now I am thinking WOW what if and what if? – and I also started thinking about the quality of the paper I am drawing on, the pencils, all these things suddenly were occurring to me. Art is like any craft, you get quality results with quality tools and experience. So the quality of the Pencil, the Paper, being vital. I have been limited with my lack of knowledge on the tools required. You can not achieve professional results like I was attempting by simply picking up a cheap pencil and general use cartridge paper! – no, you need ‘Faber & Castell’ or ‘Derwent’  and ‘Winsor & Newton’ as examples and still then you need to chose wisely what grade of ‘Derwent’ etc.


Thank you for reading and I hope this helps you understand what ‘Tortillions & Blending Stumps’ can do for you!

I will post further information on tools I use and techniques I am learning sortly 🙂

Share

Tortillions & Blending Stumps (Introduction)

UPDATE:

For my results of using 'Tortillions & Stumps' < CLICK HERE > 

———————-

Drawing peoples faces has always been a challenge for me and I am sure I am not the only one who found that I can get the shape and composition quite accurate, but when it came to shading the skin tones, well …… they end up looking about 500 years old! lol

So I discovered that IMPORTANT method people use to help get that smooth effect on the skin! (and obviously other uses that require smooth finish) – doing some research I discovered 'Tortillions' and 'Blending Stumps' some how to guides on making them.

I WILL NOT BE EXPLAINING HOW TO MAKE THEM – quite frankly I am rubbish at it, they are very cheap anyway and much better quality.

TORTILLION

This is what a Tortillion looks like:

As you can see, it is basically tightly rolled paper, with a point on the end. Mostly useful for fine details that you want to blend, smooth or soften. There really is a skill to making a tortillion, despite how easy it looks, doing this right is difficult unless you done it many times! also the type of paper makes a very big difference in the quality of your blending. The roughness or smoothness and absorbancy of the paper really matters. There is no right or wrong paper, as you can actually use papers of different type, purposely for the effect that you want. The tortillions I use I purchased on ebay fairly cheap, they are none branded but of good quality. I do not use Tortillions too often, I prefer a Blending Stump which I will discuss further down. Tortillions, I find are only really any good for one drawing then fit for the bin. But they are cheap anyway.

BLENDING STUMPS

This is what a Blending Stump looks like:

As you can see, very different but yet very similar to a Tortillion. Blending stumps are very heavily compressed paper. They last a very long time and can be used on large areas as well as small detail. I like them because they feel sturdier in the hand and last more than one use. In fact you can resharpen with fine sand paper (also done to clean them) and use them many times over. They cost about the same as Tortillions and come in many sizes. Use them on Pencil, Chalk, Crayon, tbh try them on any medium and find out! – the absorbancy is great on the ones I am using but sometimes Tortillions may be better as you can chose the paper type which you can not do with a Blending Stump.

The Blending Stumps I am using are made by Royal & Langnickel and cost less than £2.00 and been used on various drawings, no need to throw them away!

USING A TORTILLION:

It is as easy as applying you pencil marks on the page like you already do, but you then pick up the Tortillion and rub it over your pencil mark to smudge it! – apply pressure accordingly and you can control where the smudging goes. Another method of using a Tortillion or Blending Stump is to apply different grades of pencil to a scrap piece of paper like using a paint pallete and simply rub your Stump on this pallete selecting your desired grade, and then when the Blending Stump is loaded, go to the drawing and apply it where you want it. (This works best with a Stump as it is more absorbent)

This is not the best example of what a blending stump does. But will give you some idea. Left is a pencil mark left untouched. Right is a pencil mark that has been attacked with my Blending Stump 🙂

You can get some real delicate control over the blending. But I was lazy and did this as a fast quick demonstration.


I will show some examples of using them in a later post 🙂 – but now you know what I am using for shading & blending!

Share